No Cloud Storage Successfully Uploads Unity Projects

When working on a projection in Unity, y'all may want to movement information technology to another computer or a different folder location.
Maybe you're looking for a simple way to dorsum upwards your work, or peradventure you lot just want to work on it from different reckoner than you started on.
Perhaps you desire to duplicate the entire project in the same location and so that you tin can piece of work on two versions at in one case…
Whatever the reason, while it is a very simple task at that place are a couple of tips to keep in mind that volition brand moving or copying a Unity project much easier.
So… what'south the best way to move a Unity project to a new location?
The right way to move or duplicate a Unity project is by copying the entire folder to the new location, making sure to enable 'Visible Meta Files' in the Project Settings first. It also helps to remove the Library and Temp folders when moving the project, equally these can exist very large and are not required, every bit Unity volition rebuild them automatically.
This is different to exporting a Unity Package, which does not include project-wide settings and package manager dependencies. Moving a project by copying the binder is the all-time method for moving an entire project to a new location without breaking it.
In this article I'll be exploring each step in item, as well as a few tips to make moving your project a little easier.
Hither'southward what you'll discover on this folio:
How to move a Unity Project step past step
- Enable Visible Meta Files
- Delete the Library and Temp folders (optional)
- Shrink the folder to a Zip file (optional)
- Copy the project folder to the new location
- Add the project to Unity Hub
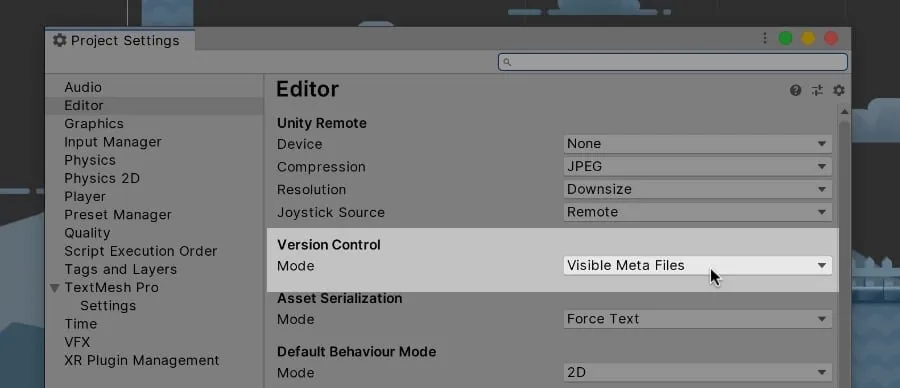
The Version Control option in Project Settings allows you to brand hidden meta files visible. A must when using version command software.
Got to Edit > Projection Settings and select the Editor Tab.
Notice the Version Command Fashion and, if it'due south non already, set up it to Visible Meta Files.
How to change the Version Control in Unity 2020 and up
In Unity 2020, yous'll find this option in the Version Control tab of the project settings, non the Editor tab.
Why should you lot enable Visible Meta Files in Unity?
In Unity every asset has hidden meta data that is used to brand and maintain references betwixt script variables, game objects and assets. This meta data is stored in .meta files which are created past Unity when you import assets.
These meta files are hidden by default and, while Unity does not need to exist visible to use them, other software may do. Enabling Visible Meta Files but makes sure that they are included when the project is moved or copied.
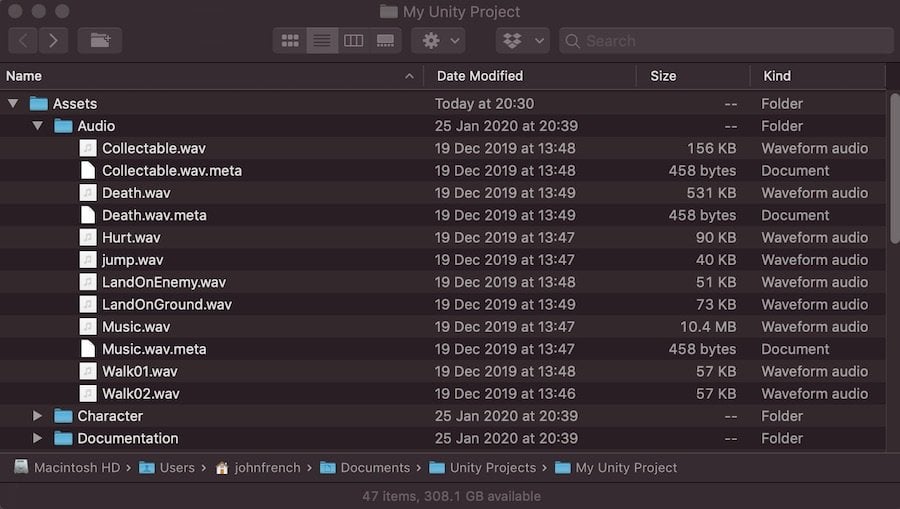
Ordinarily hidden, Unity's meta files are used to maintain references betwixt objects and assets.
This prevents the subconscious references from being recreated, overwritten, or duplicated which can cause cleaved connections and errors. This is especially important if using version command software or when accessing the same project from multiple locations.
The good news is that, while researching for this article, I wasn't able to deliberately suspension a project by keeping the meta files hidden, so it'due south unlikely that missing out this step will cause you many problems in near scenarios.
However,
Equally it's such an easy step, and because it can potentially protect your entire project from breaking when you move it, information technology's good practice to set up them to visible anyhow.
ii. Delete the Library and Temp folders from the project directory (optional)
Deleting the Library and Temp folders tin can help to bring the size of the project downward before moving it.
This stride is optional and only applies if you wish to move a Unity projection to a different calculator.
Open File Explorer (Windows) or Finder (Mac) to find your Unity Project.
Unless you've changed the default location for new projects, you lot'll notice your projection in your Documents folder under Unity Projects.
If you lot can't find your project binder then open up the Unity Hub, discover your project in the listing and select 'Evidence in Explorer'.
Once y'all've constitute your project folder, copy the unabridged directory to a new location (your desktop for example).
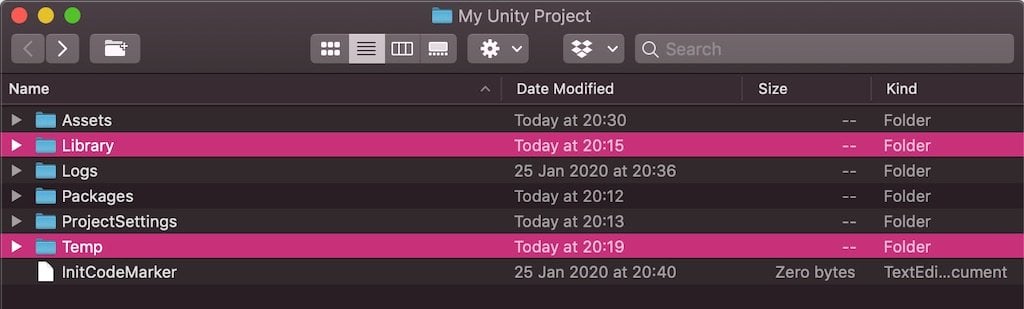
Open the copy and delete the Library folder and the Temp folder (if in that location is 1) from the directory.
Why should you delete the Library and Temp folders?
You don't have to delete these folders.
The reason that you may want to, however, is to reduce the size of the directory before you motility information technology.
For case, to test this method I moved a pocket-size project which, when zipped, was 180 MB in size with the Library binder included.
Past removing the Library folder first, it was only 25MB.
Removing the Library and Temp folders can massively reduce the size of the folder temporarily. This is ideal if you desire to fit it on a small USB stick or share it online.
Then, when you open the projection copy, Unity volition rebuild the Library folder in the new location, restoring it to its original size.
Why brand a copy of projection directory offset?
Copying the projection to a different folder first lets yous remove the unnecessary Library and Temp folders without damaging your project.
It is safe to remove the Library and Temp folders from the original project directory equally Unity will simply rebuild them when you side by side open the project.
However,
For the fourth dimension it takes to brand a copy of the project first, it'due south much safer to practise it this mode. As deleting the incorrect binder by mistake could break your projection.
3. Compress the binder to a Nothing file (optional)

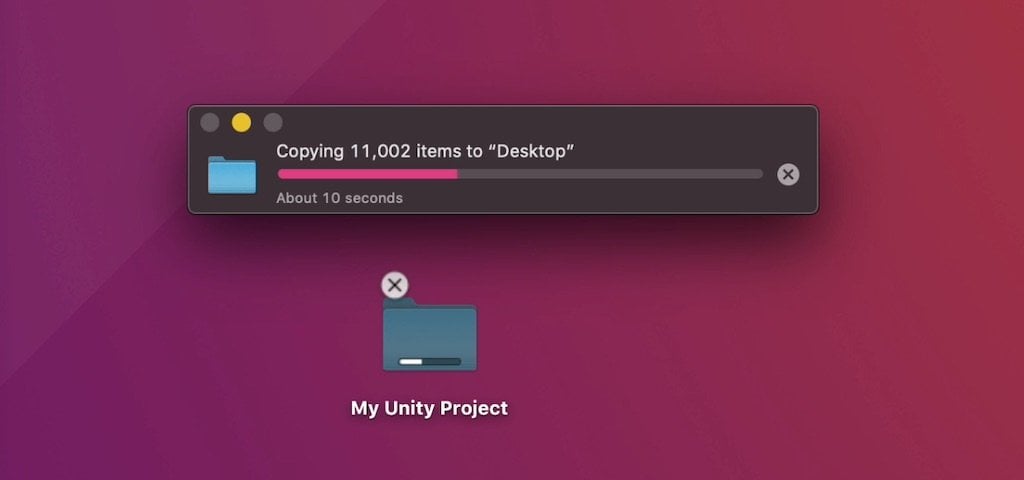
Unity projects, even pocket-size ones, have thousands of files. Zipping the directory makes the project easier and quicker to move.
This step is optional. It's near relevant if you lot wish to upload a Unity Project using cloud storage, such equally Dropbox.
When yous're ready to movement your project, it'southward time to Zilch the project folder.
Right Click on the root folder, which is named after your project, and select Send To > Compressed (Zipped) Binder (Windows) or Compress (Mac).
Why should y'all Zilch the project folder starting time?
You lot don't have to Zip the project folder to move it.
Withal…
A Unity project, even a small one, may include many thousands of files.
And while this may not cause you any issues when moving a projection locally, it can affect performance when uploading and downloading so many individual files. Something you lot may take noticed if y'all've ever created a new project (even a completely empty one) inside of a Dropbox binder.
For example,
It took 1m 33s to upload my test project which, although small, included near 10,000 individual files.
To upload the aforementioned project when zipped, only took xl seconds.
And while the fourth dimension savings in my example are small-scale, it's probable that your project is much larger and much more than circuitous.
Zipping the folder makes information technology easier to manage and quicker to motion.
4. Copy the project folder to the new location

Move the copied project folder to the Unity Projects folder on the target figurer.
Lastly, paste the directory, or extract the zipped project folder, to the new location.
How to create a duplicate Unity Project in the same location
If you lot're not moving the projection to a new location, and all y'all want to do is create a working indistinguishable in the same folder every bit the original project, here'south how to do it.
- Enable Visible Meta Files merely ignore steps two and 3.
- Indistinguishable the project folder inside the Unity Projects directory.
- Rename the new folder as you lot like.
- Add the new projection copy to Unity Hub (see beneath).
v. Add the projection to Unity Hub

Click Add to add the new location to your Unity Hub afterwards you've moved it.
If you're using Unity Hub you'll need to add your, at present moved, project to the listing of Projects in your dashboard.
Simply open Unity Hub, click Add and select the new projection directory.
At this point you lot may also desire to make certain that you have the aforementioned version of Unity installed as the source project (if moving the projection to a new arrangement).
If you don't, you lot tin download a specific version of Unity, (including older versions) from Unity's download archive.
You can now open the project as normal.
How to remove a project from Unity Hub
If you're no longer using the original project you may want to remove it from the Unity Hub projects list.
To do then only detect the project from the list and select Remove from List from the dropdown bill of fare on the right hand side.
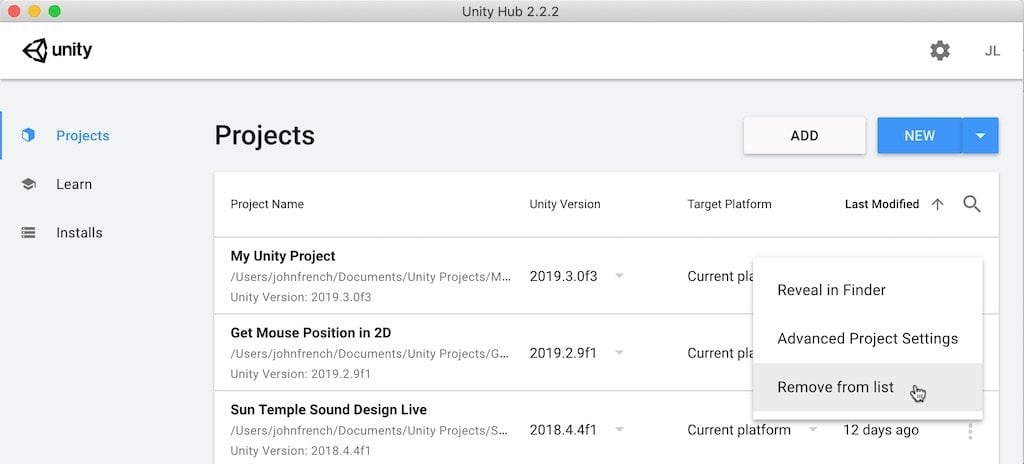
Removing a projection from the Unity Hub does non delete information technology, only it does tidy upwards your listing.
This will remove the project from the Unity Hub list just it volition non delete the projection folder.
If you want to do that, you can simply delete the project folder manually from the Unity Projects folder.
At present I want to hear from you
If you've been working in Unity, chances are you've had to move your Unity project at some point.
What happened?
Were yous able to motion the project without breaking information technology?
And if something did go wrong, what practice you wish y'all had known beforehand that would assistance someone else right at present?
Whatever it is, let me know by leaving a annotate beneath.
Image Attribution
- Icons fabricated by Freepik from world wide web.flaticon.com
- Unity Logo © Unity Technologies

My favourite fourth dimension-saving Unity assets
Rewired (the best input management organisation)
Rewired is an input management asset that extends Unity's default input system, the Input Managing director, adding much needed improvements and support for modern devices. Put simply, it'south much more avant-garde than the default Input Manager and more reliable than Unity'south new Input System. When I tested both systems, I establish Rewired to be surprisingly like shooting fish in a barrel to utilize and fully featured, so I can sympathise why everyone loves it.
DOTween Pro (should exist built into Unity)
An asset then useful, it should already be built into Unity. Except it's not. DOTween Pro is an blitheness and timing tool that allows you to animate anything in Unity. You can move, fade, scale, rotate without writing Coroutines or Lerp functions.
Easy Save (there's no reason not to utilise it)
Easy Salve makes managing game saves and file serialization extremely easy in Unity. And then much and then that, for the time information technology would have to build a save system, vs the cost of buying Easy Salvage, I don't recommend making your own save system since Easy Save already exists.
Source: https://gamedevbeginner.com/how-to-move-or-copy-a-unity-project-without-breaking-it/
0 Response to "No Cloud Storage Successfully Uploads Unity Projects"
Post a Comment